Image Handler
The LiteCAD Image Handler is a tool native to the LiteCAD.DLL used to catalog and manage raster graphics ( NOT including ECW or JP2 ) used in your drawing/map. The Image Handler for the Fleet base map is shown below:
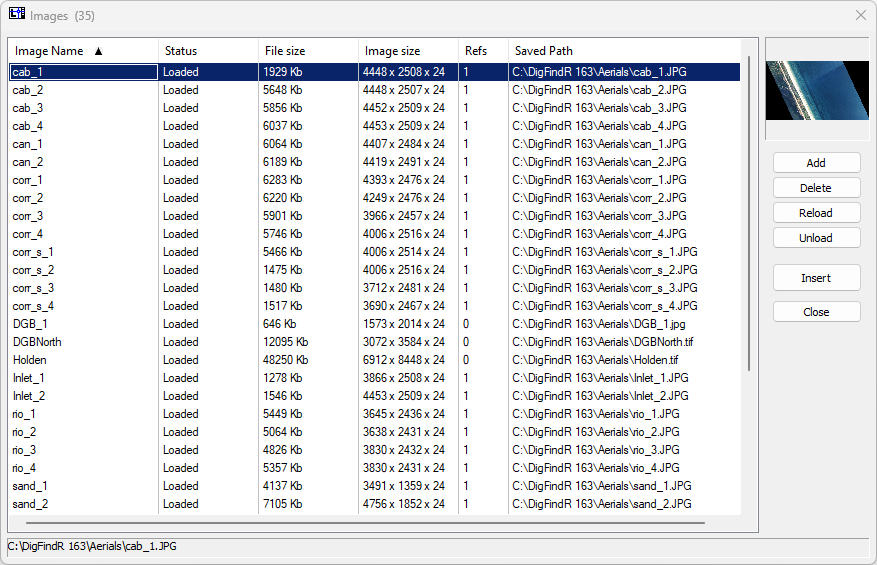
The Image Handler shows you which images are included in the drawing, their path, their byte size, their extents and color depth, and whether they are currently loaded ( read "included" ) in the drawing. The total number of images in the current collection for a particular drawing/map is seen in the title bar of the Image Handler... 35 in this case.
Image Handler Functions
The columns of the display are collapsible, and the entries in the table can be sorted by Image Name and/or Saved Path. The currently selected image, in this case corr_s_1.JPG is shown as a thumbnail image in the upper right corner of the Image Handler. The full path and name of the currently selected image is seen in the status bar at the bottom of the Image Handler. To dismiss the Image Handler, click on the "Close" button.
- Add an image to the Image Handler by clicking on the "Add" button, which will open a Windows File Dialog. Select the file from the File Dialog. That file will appear in the Image Handler table.
- Delete an image file from the Image Handler by selecting a file in the table and clicking on the "Delete" button.
- Reload and image in your drawing by clicking on the "Reload" button once you have selected the desired file from the table.
- You can Unload an image from the drawing without deleting it from the Image Handler by selecting the file in the table and clicking on the "Unload" button.
- Insert your selected image into Map Window by clicking on the "Insert" button. A small directive popup will appear as seen below:

- If you know the X and Y (Longitude and Latitude) of the insertion point, and which corner of the image is the insertion point, you can un-check "Specify on-screen". Likewise if you know the dpi of the image and the number of feet per pixel, you can un-check "Specify on-screen". Normally you will not have this information, so simply elect to place the image in the Map Window manually.
- To insert the image manually, click in the Map Window and move your cursor diagonally. A place-holder grid will appear as you move the cursor. Click the mouse to replace the place-holder with the actual image.
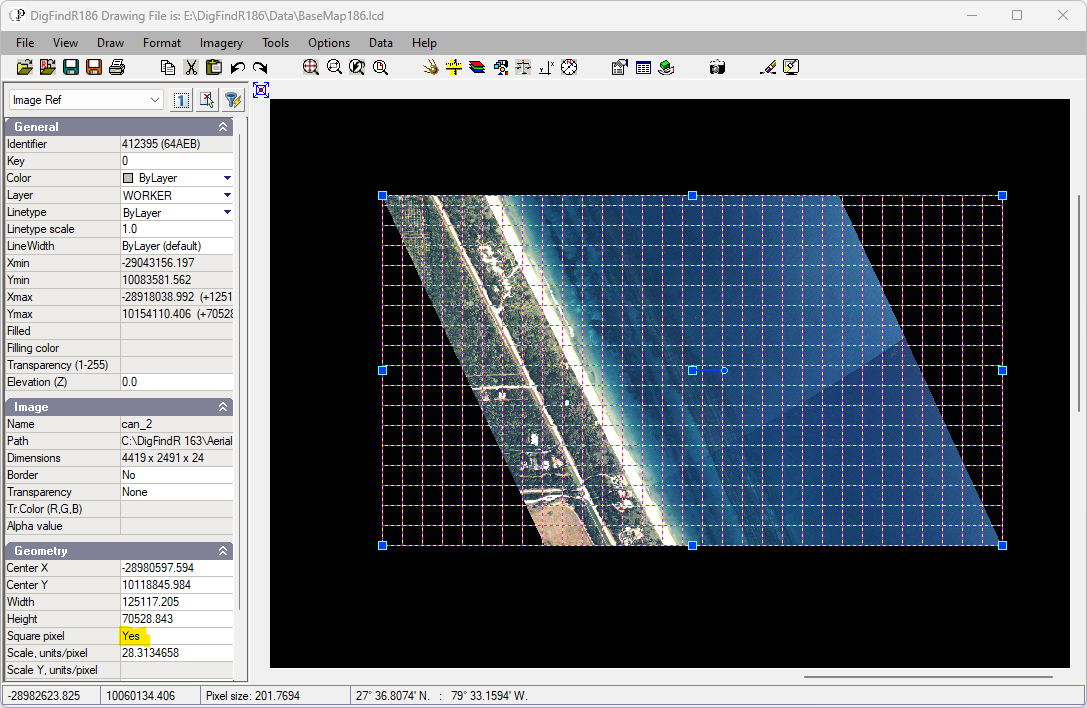
As a default, images placed into the Map Window are always set using "square pixels". In the following illustration, the inserted image is selected and the Property Window indicates that Square Pixel is "Yes". In almost all instances, to mange the image geographically, you need to set the Square Pixel value to "No". The drawing must be saved for this property to take permanent effect.
Any selected raster graphic can be edited for size, rotation, and transparency via its handles or properties in the Property Window. ECW and JP2 images are the exception. Be aware that if you delete a selected image from the Map Window, it will remain listed in the Image Handler. To remove all references to the image, you must also delete its reference from the Image Handler.