World Files
World Files are small text files known as "sidecar" files that contain certain parameters for the placement of raster graphics inside the world coordinate systems of Geographic Information Systems. They were specifically designed for that purpose and when opened in a text editor they might appear as this one does, sans the parenthetic descriptors:
1.76329430454477 (size of pixel in x direction)
0.000000000000 (rotation term for row)
0.000000000000 (rotation term for column)
-1.56323478500625 (size of pixel in y direction)
-29267100.6773077 (x coordinate of center of upper left pixel in map units)
10056074.0673265 (y coordinate of center of upper left pixel in map units)
World Files share the filename of their parent image file and have a modified extension, to wit: thisimage.tif would have a World File named thisimage.tfw, and thatimage.jpg would have a World File named thatimage.jgw. Both the parent and the World File are stored in the same directory.
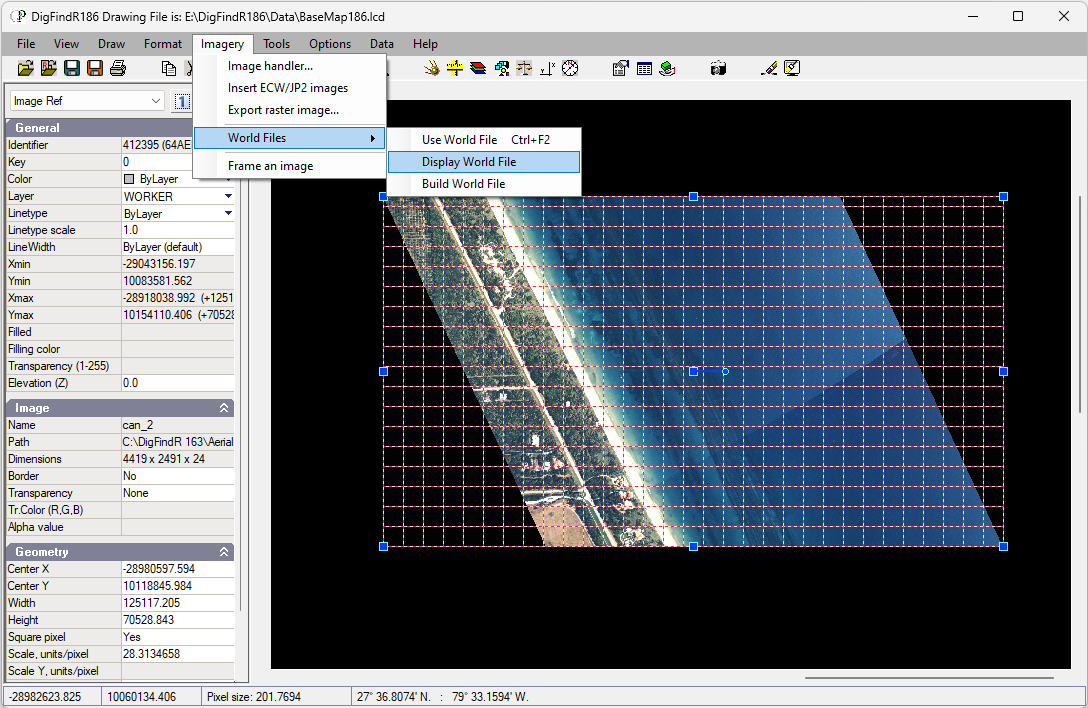
Display World File
DigFindR can display World Files, build World Files, and employ World Files to place imagery inside the Map Window. World File utilities are accessed via the IMAGERY MENU.
Once an image is inserted into the Map Window you can select it and inquire if the image has a World File by choosing "Display World File" as seen in the following illustration.
If the image does not have a World File, a message box will appear indicating there is no World File. If the image does have a World File, a message box will appear showing you the contents of the World File, as would be the case with the selected image seen above, to wit:
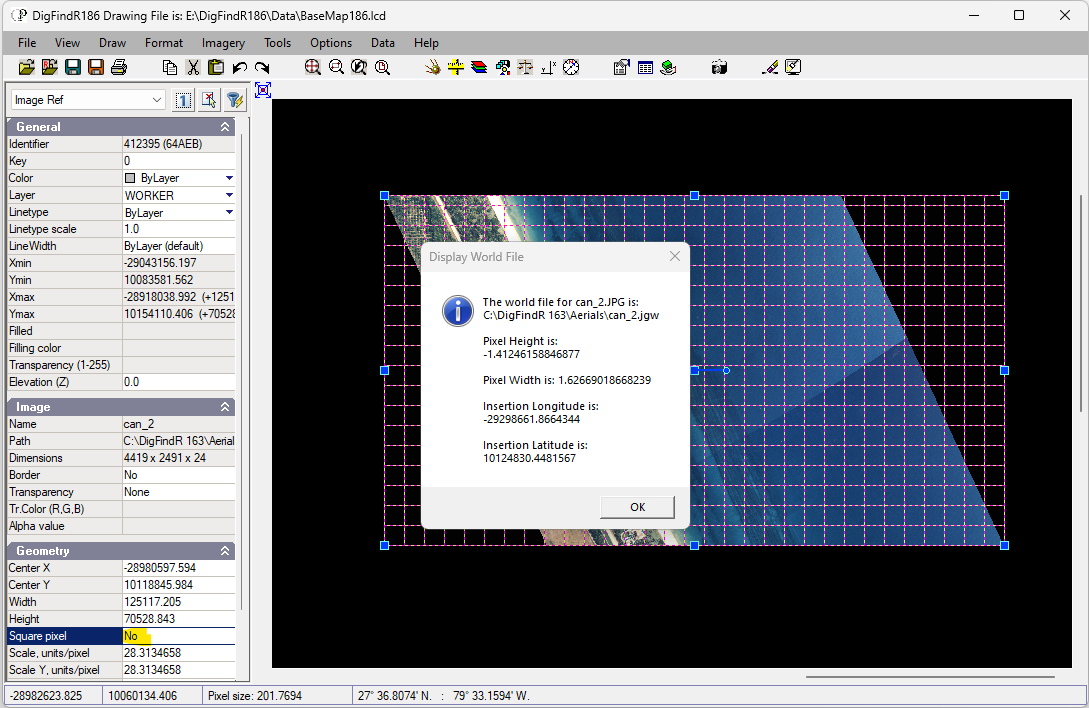
We see that the pixels are not "square", rather having a Pixel Height that differs from the Pixel Width. Therefore the value in the Property Window for Square pixel should be changed to "No".
Use World File
To make use of the World File, use the Hot Key Combination of Ctrl+F2 and you will be asked if you want to use the World File. Click on Yes and the image will be moved into position according to the parameters in the World File. The Map Window will immediately zoom to full extents. Your image will now be located per World File parameters.
Build World File
Once you have your image arranged in the Map Window and are confident that its features are matching real world latitude and longitude, you can select the image and build a world file.
- Select the image and click on the "Frame an Image" in the Imagery Menu. The map will zoom to full extents. Click on the
 button in the Button Bar to return to your original view. A white border with the image name and path will appear surrounding the image as seen below:
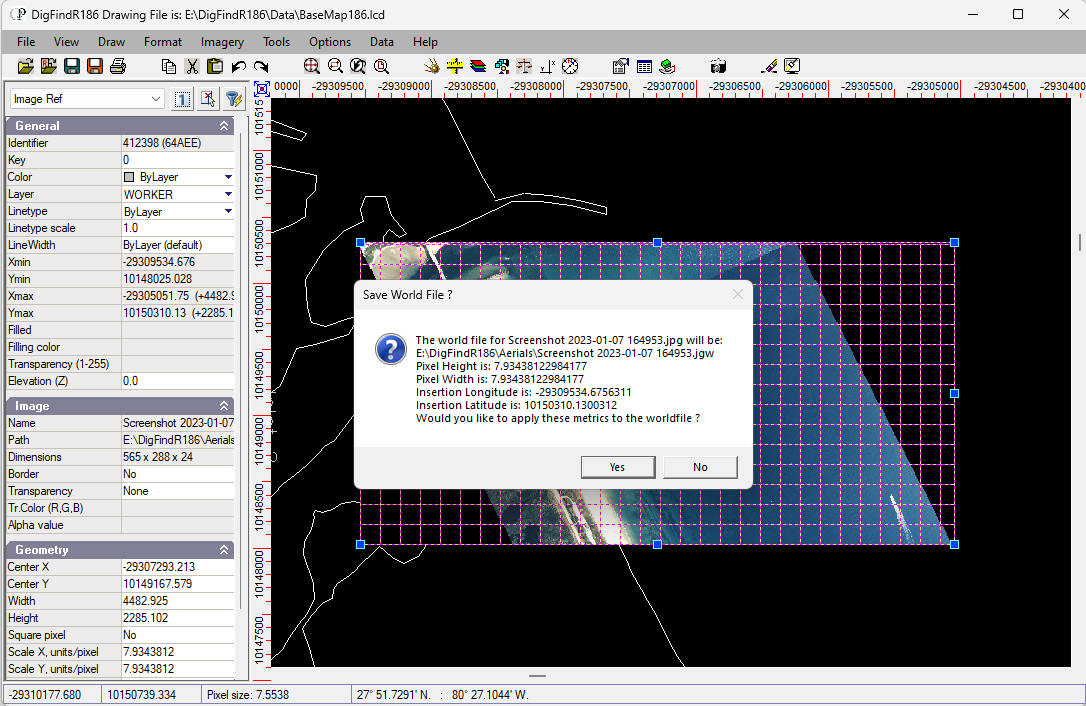
- Click on the image again to select it. Click on the "Build World File" menu item. A message box will appear with the contents of the World File. Answer "Yes" to save the World File. It will be saved in the same directory with the original image.
Thereafter, you may place the image in any drawing, select it and use the Ctrl+F2 hotkey and employ its world file to position the image correctly into world coordinates.