Ground to Grid Fix
DigFindR only supports its own internal coordinate system. In that system, a foot of measurement is equal in both X and Y directions. DigFindR does not really support map projections. A "projection" is a method of fitting a flat plane (a map) onto a curved surface (the earth). The closest projection that might be of use to DigFindR might be the equal-area projection, however, DigFindR is not designed to be a world mapping application; it is designed simply to support the user's GPS unit, large-scale measurements, compass angles, and sextant bearings throughout a relatively small area on the face of the earth.
Generally, aerial imagery is collected and stored in a projection, or using finite coordinate systems such as State Plane. We actually use Geographic coordinates in DigFindR. When you collect aerial imagery, you must usually re-fit it into DigFindR's world space by stretching it in X and Y to match real-world coordinates. This is known as "rubber-sheeting" the image. Once you've stretched it into place, you can build a World File for that image, and pass the image and World File along to other DigFindR users, or other maps you might construct yourself using DigFindR.
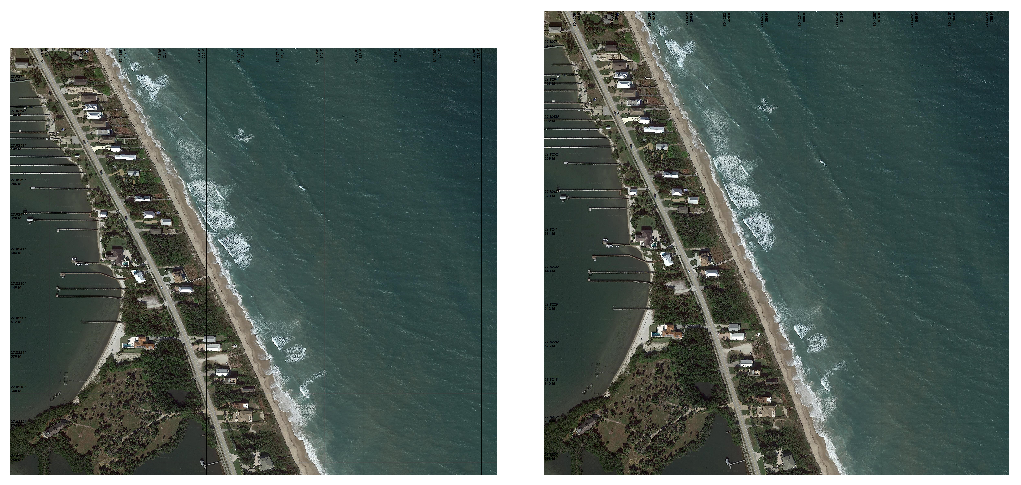
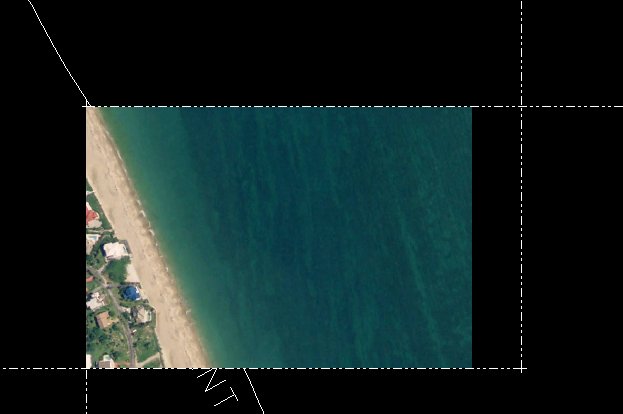
The image on the left above is Google Maps aerial imagery rubber-sheeted into DigFindR. The image on the right is the actual image as hosted in Google Maps. The same image would appear in Google Earth, which reflects cursor positions in latitude and longitude. The aerial as hosted in Google Maps is true orthographic in a particular projection. The same image in DigFindR is still orthographic, but adjusted to fit equal-area as defined within DigFindR itself. There are several map servers online that will echo your cursor position in latitude and longitude as you hover over their aerial imagery, and these services can be used to obtain Ground Control Points (GCP's)
Ground Control Points
To set an aerial into DigFinder, you need two GCP's, and they should be on a diagonal to one another. The greater the diagonal angle the better, and the farther apart the two points are, the better. When possible, collect GCP's at opposite corners of the image. GCP's can be anything you can easily identify in the photo; corners of buildings, centers of intersections, or other features with permanence should be used. Remember, we are dealing with the shoreline of Florida, and building features are greatly affected by hurricanes. Examining the same aerials year after year will make this clear. You can do this using the "History" tool in Google Earth, or you can visit various Property Appraiser Offices for the coastal counties and find aerials taken over a period of years.
You must make sure that the image you are trying to rectify in DigFindr has its "Square Pixel" value set to "No" before you can perform any rubber-sheeting operations on that image.
Another quick method of acquiring imagery at a fixed pixel value is to take a snapshot of the Google Earth application running on your computer. Let's say we want an image for Sandy Point. Open Google Earth and go to the area where the Sandy Point is located as seen below:
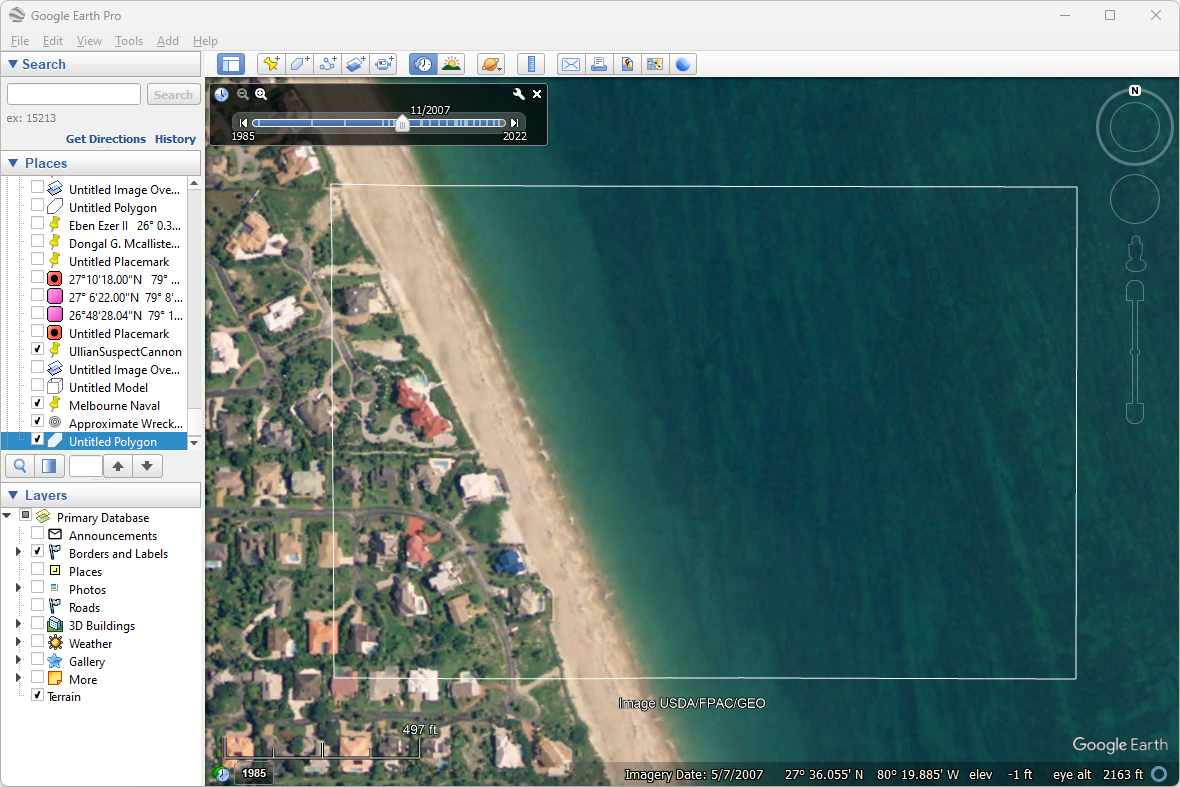
- Draw a rectangle in the Google Earth map window and note the lat and long for the NW corner of the rectangle and the SE corner of the rectangle as shown in the lower right corner of the Google Earth application window. Write these values down. Make sure that Google Earth is maximized on your screen and press your Print Screen button on your keyboard. The screen image is now in the Windows Clipboard.
- Open your favorite image processing program and paste the image into it. Select the portion of the image that falls within the rectangle and crop the image to that part of the image.
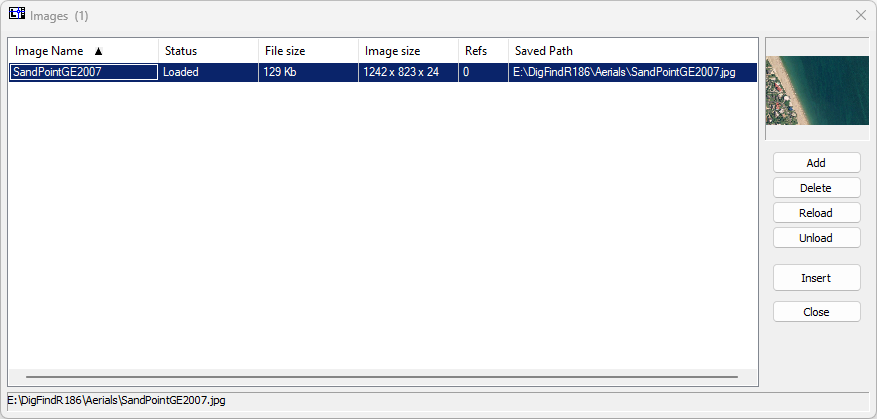
- Save the image as a JPG or TIF (preferably JPG, and for this example we save it with the filename of SandPointGE2007).
- Now, I open the Image Handler and add the SandPointGE2007.JPG to the referenced image list for your working drawing/map as seen in the following illustration:
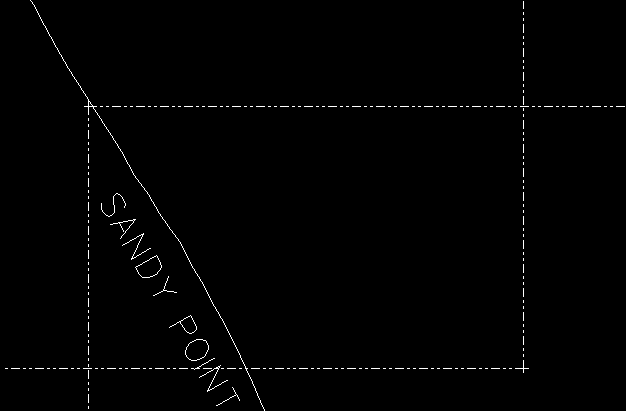
- Using the Fix Dialog, the NW fix and the SE fix are marked in the Map Window and construction lines are drawn to form a boundary for the new SandPointGE2007.JPG as seen below:
- In the Image Handler click on the "Insert" button and a dialog will appear giving you the choice of dictating a specific insertion point and scale, however, the default will be to insert the image manually. You probably will not be able to specify otherwise. Insert the image starting at the lower left and move your cursor diagonally toward the upper right until the placeholder grid fills your outline from bottom to top. Click and the image will fill the placeholder.
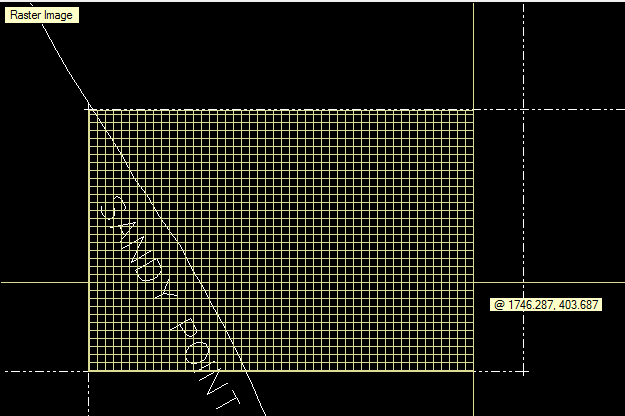
- As you can see in the illustration below, the aspect ratio is not correct in the X plane... the image is fine in the Y plane, but it needs to be stretched in the X plane to meet the eastern boundary of the bounding box. You should always stretch images using the lower left corner as the anchor point. DigFindR always inserts images from the lower left corner of the image, filling upward and to the right.
- Now select the image and make certain that the Square Pixel property is set to "No" in the Property Window. This step is absolutely essential. You are now ready to stretch the image into world space matching DigFindR's working coordinate system, as illustrated below:

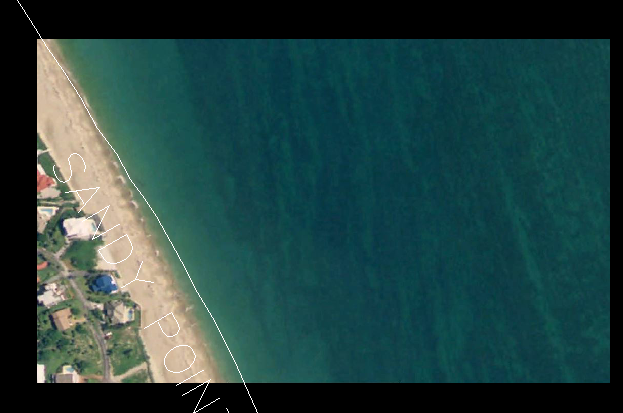
- Using the Pick Box, seize the middle handle on the right of the image and drag it over to meet the right boundary line of the bounding box. That places the image in the correct world space, and you can delete the bounding box and the corner markers. At this point you should save the drawing/map.
It's usually a good idea to build a World File for images you place in your maps. A World File is a small text file that contains parameters for the placement of the parent image in world space. DigFindR can build World Files for TIFF images and JPEG images. It also reads World Files for both types. Once a World File is built for a specific image both the image file and the World File will be found in the same directory. In the case of the SandPointGE2007.JPG file we just used, the World File would be named SandPointGE2007.JGW. Once the World File is built you can ship it along with the original image file to other users, or re-use the image in another drawing without having to waste time placing the image correctly into world space. You simply instruct DigFindR to move the image into place using the World File for parameters.