GPS Dialog
DigFindR supports Geographic Positioning System inputs via serial communications between the GPS receiver and your computer. By using GPS, you can locate your boat in the Map Window in real time. DigFindR has been tested using Garmin GPS receivers over direct 9-pin serial ports. The program expects the Baud rate to be 4800 and it can communicate with your GPS receiver using any of 6 different Com Ports, but only those. If you have your computer configured to use a Com Port other than 1 through 6 for your GPS receiver, the GPS Dialog will not work.
The 9-pin serial port is no longer common on newer computers, replaced by the USB port. In that case an adapter, USB to Serial, must be used, and that can be a little tricky to set up in our experience. Most software drivers for these adapters are error prone at best, or completely unreliable at worst. In the case of the Garmin GPS models, you can purchase USB to Serial adapters directly from Garmin that should work properly.
To activate the GPS Dialog click on the  button in the Button Bar, or use the "GPS tracking" menu choice in the TOOLS MENU. The GPS Dialog in its dormant stage will appear as seen below if you summon it without a GPS receiver attached to your computer.
If you activate the dialog without a GPS receiver running as an attached device, there will be a message box that first appears as seen here.
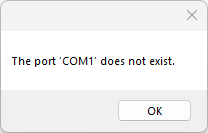
Otherwise, if you do have a GPS receiver attached to you computer, click on OK and the GPS Dialog will appear. The dialog is set up by default to connect to Com Port 1 on your computer, and the previous message indicates that COM1 is not found by the dialog. If you do have a GPS receiver attached via serial port (COM Port), then select the COM Port you're using on the dialog to connect the receiver to the dialog. If you are using COM Port 1, you will not see the previous message.
TIP: Normally you should have your GPS receiver attached to your computer BEFORE you turn your computer on, and the receiver should not be powered up until your computer is running. Otherwise you might experience difficulty with the mouse on your system, or you might notice the mouse pointer moving erratically around your screen. I recommend that you do not power up your GPS receiver until you have DigFindR up and running.
Mode of Operation
The GPS Dialog captures the GPGGA string sent by the GPS receiver, and reports the number of satellites being used along with the Latitude and Longitude of the receiver's antennae in the dialog's readouts. Basically the GPS Dialog seizes control of the system cursor and the underlying map in the Map Window. When the dialog is activated, the Property Window and Rulers will be dismissed. You then click on the "Update" button to start processing the GPGGA data. There are two ways to locate your position using the dialog:
- Click on the "Track" button to begin tracking your position with each refreshment of the dialog's readouts. The cursor will center itself in the middle of the DigFindR Map Window which is your current location in relation to the underlying image and a small cross symbol will be added to the map at that point. The underlying image will move to match the cursor's fixed point in the center of the DigFindR Map Window. This will occur every few seconds if there are more than 3 satellites in view. The number of satellites in view is seen just below the Latitude and Longitude readouts. When the dialog is not receiving a signal, during cycles, the readouts will say "No GPS". At this point you can seize control of the cursor with your mouse and click on the button which will now say "Stop Track" if you want to stop tracking yourself in the Map Window. That will interrupt the input of the GPGGA string to the dialog. The idea here is that you "Track" your position while underway. Be aware that it is a good practice to hide any aerial image you have in your map while in Track mode because with each refreshment of the readouts, the map is actually being redrawn. Redrawing raster graphics can make the routine sluggish.
- Once you've stopped Track mode, the Pan button will become accessible. Use the Pan button when you are near the position where you wish to remain stationary, for example at the point where you are setting anchors. Even while stationary, the map will move with each update of the readouts because the GPS receiver will never dwell completely in one position. GPS is an approximate position tool and is dependant upon signals from satellites that are obscured from view on the horizon over time, with new signals coming to the fore. The quality of your receiver coupled with the constellation of GPS satellites determine the actual dwell of your position. Once your vessel is stationary, you can stop the Pan function, or stop the Update, or both. When you move your boat for a new excavation, Update the GPS Dialog and Pan once more to establish your new position. Then click on the "Stop Updates" button.
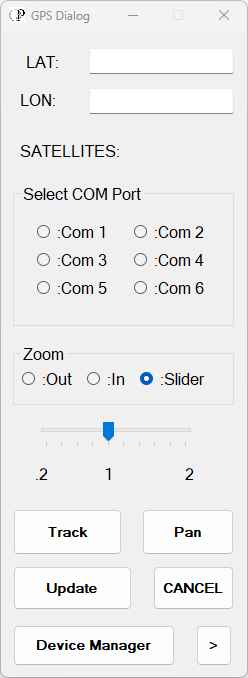
In the sample illustration below, the GPS Dialog is operating in Track mode. There are 8 satellites in view. Note the "Pan" button is inactive while in Track mode. When in Pan mode the "Track" button becomes inactive.

Once you've activated the GPS Dialog it will remain visible unless you click on the "CANCEL" button, in which case, the dialog is dismissed. You can click on the button again to expose the dialog once more and reload it.
While the GPS Dialog is active, the viewing extents of the Map Window are fixed at certain zoom levels. You have a limited selection of Zoom modes available while using the Track or Pan mode with the Update function active. Use the Slider to set your view extents with each update of the readouts. Otherwise, click on the "Out" or "In" radio button controls to adjust zoom. Be aware that the zoom effect is not immediate: it only occurs with the next update of the readouts.
The GPS Dialog has a new feature added recently, which permits you to plot your track. Click on the arrow head immediately to the right of the "Device Manager" button to expose the hidden track data panel.
Track data is simply the reading received by your GPS every cycle. This data is saved in a CSV file named "GPStrack.CSV" in the DigFindR home directory whenever you activate your receiver using the "Track" function. The track data contains five columns; date/time, decimal minute Latitude, decimal minute Longitude, raw X coordinate, and raw Y coordinate.

Once you have the track data loaded, you can edit it as necessary, save the edited file with an alternate name, open an alternate file (use the "Load Alternate" button), and you may zoom to any fix in the track data by selecting a row and using the "Go To Selected" button.
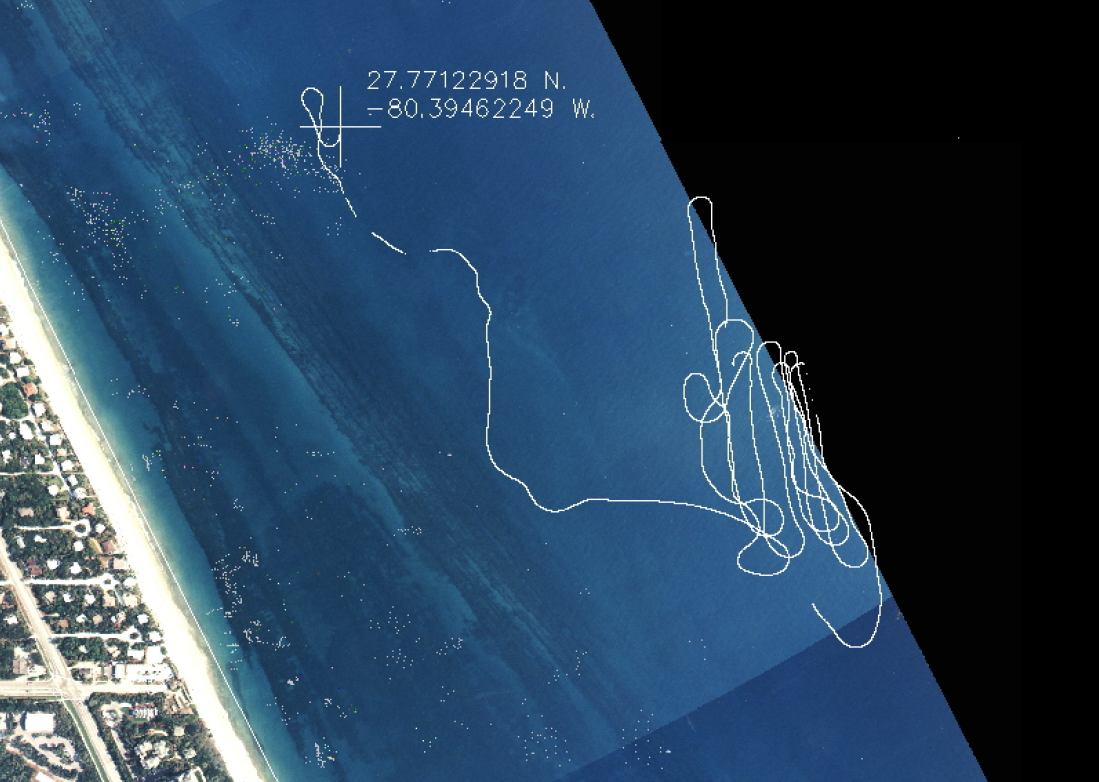
You also have the option of building a track on screen in the Map Window, a handy feature when running mag studies, or retracing one's path back to any given point. An actual sample of GPS track date is seen below in the Map Window...